
Blocking out time disables any bookings being made with you, but only during that set time period:
1. On the left hand side of the screen, click on Appointment Calendar
2. Next, select the purple Create Appointment button, on the right hand side

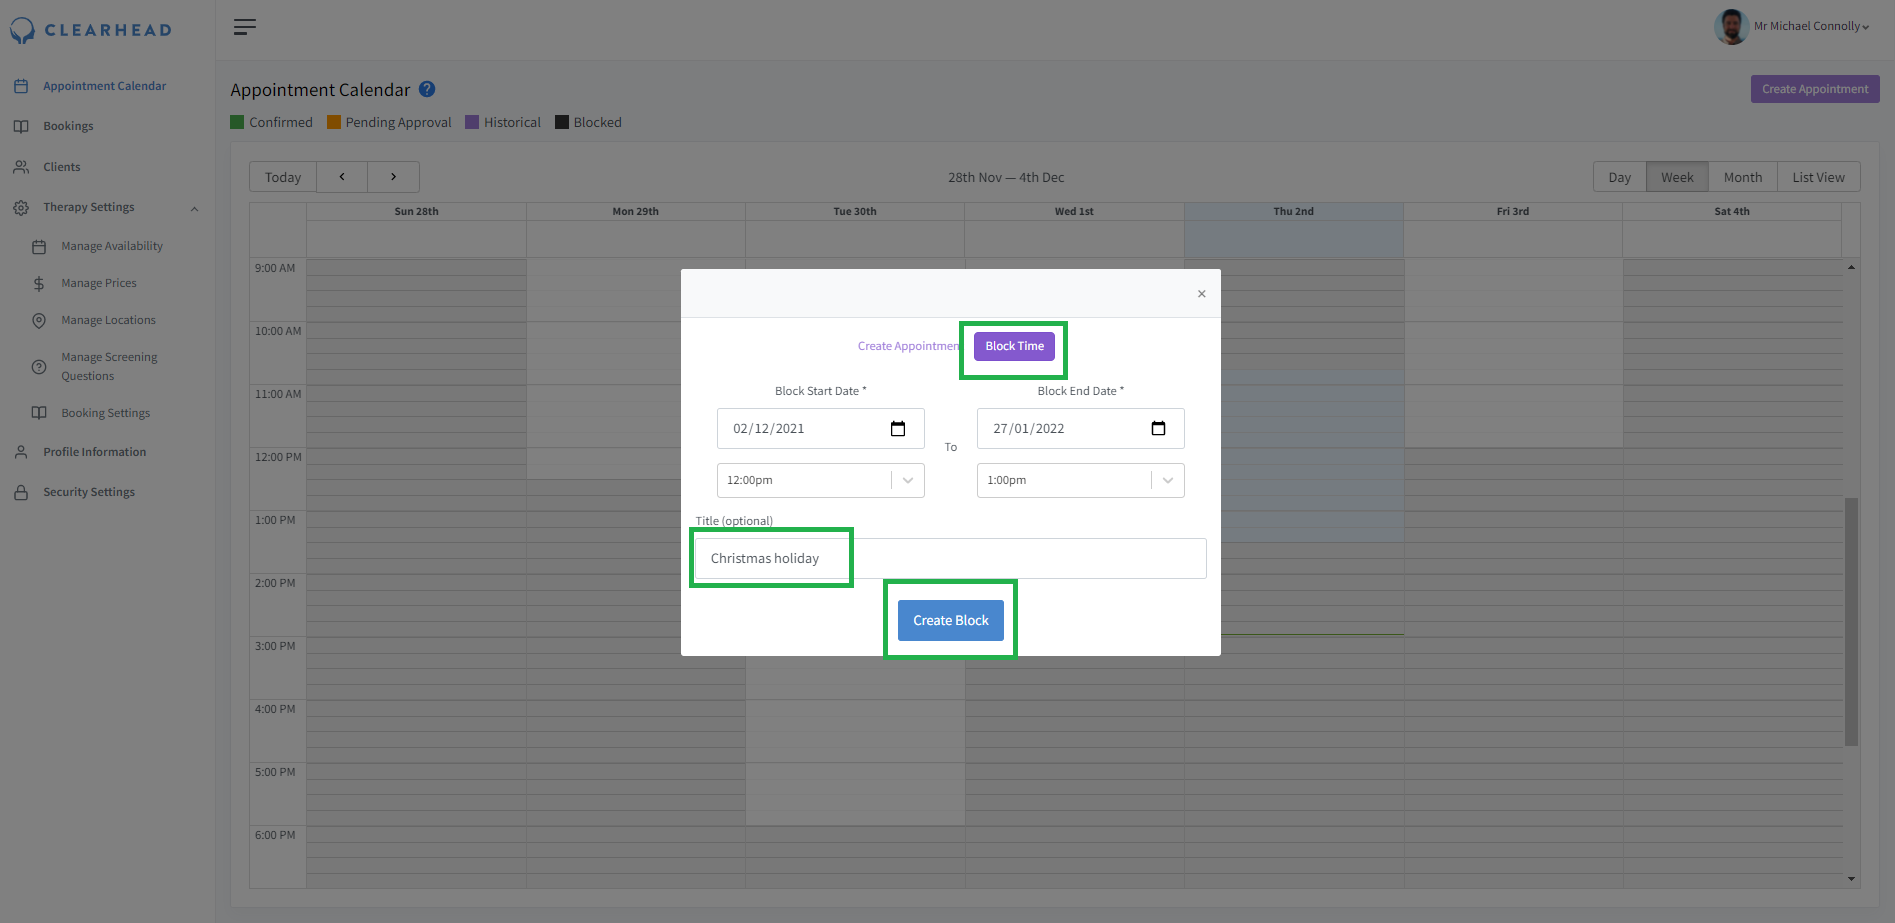
3. Select Block Time, this is next to Create Appointment (as seen below)
4. Populate the Block Start Date to Block End Date fields
5. Add in a relevant Title for your blocked out time
6. Click Create Block to save your settings
Here's how blocked out time will actually look, on your Appointment Calendar:


Note: Although adding a title is optional, it's definitely recommended! Without one, your blocked out time can become difficult to spot:
Month

Week

Day

To delete blocked out time, click anywhere on the block itself and the following screen will appear:
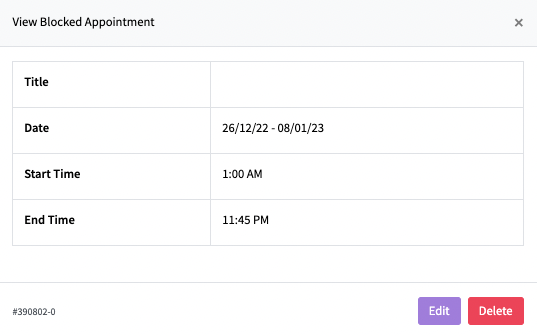
.